
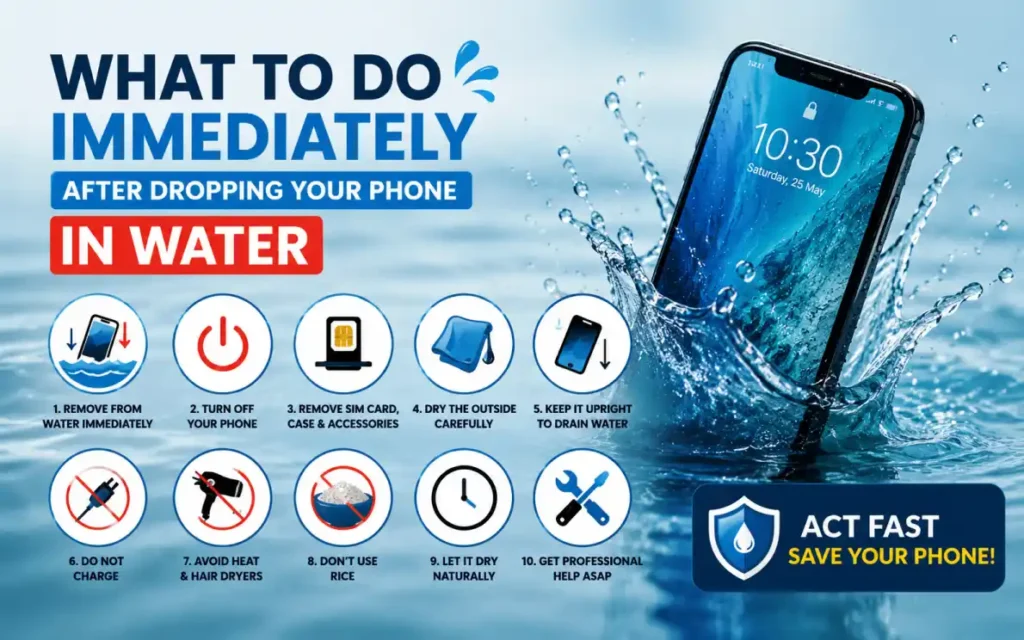
A Step-by-Step Guide to Minimize Water Damage and Save Your Smartphone
Dropping your phone in water can be a stressful experience. Whether it falls into a sink, swimming pool, toilet, or gets soaked in heavy rain, acting quickly can make the difference between a simple repair and a completely damaged device.
Many people make the mistake of turning their phone on, charging it, or placing it in a bag of rice. These actions can actually make the damage worse.
In this guide, we’ll explain exactly what to do immediately after dropping your phone in water, what mistakes to avoid, and when it’s time to seek professional water damage repair.
Why Water Damage Is Dangerous
Modern smartphones contain hundreds of tiny electronic components. Even a small amount of water can cause:
- Short circuits
- Corrosion on the motherboard
- Battery damage
- Display failure
- Charging issues
- Speaker and microphone problems
- Permanent data loss
The faster you act, the better your chances of saving your phone.
Step 1: Remove the Phone from Water Immediately
Every second matters.
As soon as your phone falls into water:
- Pick it up immediately.
- Don’t press unnecessary buttons.
- Keep the charging port facing downward to help drain water.
The longer your phone stays underwater, the greater the chance of internal damage.
Step 2: Turn Off Your Phone
If your phone is still on, switch it off immediately.
If it has already turned off:
Do NOT try to turn it back on.
Electricity passing through wet components can cause permanent short circuits.
Step 3: Remove Accessories
Take off everything you can safely remove:
- Phone case
- SIM card
- SIM tray
- Memory card (if applicable)
- Stylus (if available)
Removing these allows trapped moisture to escape more easily.
Step 4: Dry the Outside Carefully
Use a clean microfiber cloth or soft towel to gently dry the exterior.
Pay special attention to:
- Charging port
- Speaker grills
- Microphone
- Camera lenses
- SIM tray opening
Avoid rubbing aggressively, as this may push water deeper inside the device.
Step 5: Keep the Phone Upright
Place your phone on a dry, flat surface with the charging port facing downward.
Gravity can help any trapped water drain naturally.
Step 6: Avoid Charging Your Phone
Never plug your phone into a charger while it’s wet.
Charging a water-damaged phone may:
- Short-circuit the charging port
- Damage the battery
- Harm the motherboard
Wait until the phone has been professionally inspected or is completely dry.
Step 7: Do NOT Use Heat
Many people try to speed up drying with:
- Hair dryers
- Ovens
- Microwaves
- Heaters
These methods can warp internal components and damage the battery.
Always let the phone dry naturally.
Step 8: Don’t Shake the Phone
Shaking your phone may spread water into areas that were previously dry.
Instead:
- Hold it gently.
- Let gravity do the work.
Step 9: Skip the Rice Trick
One of the biggest myths is placing your phone in a bag of rice.
Why Rice Doesn’t Work
Rice:
- Doesn’t remove moisture trapped inside the phone.
- Can leave dust or starch inside charging ports.
- Delays proper professional treatment.
- May allow corrosion to worsen while you wait.
Professional drying equipment is much more effective.
Step 10: Visit a Professional Repair Shop as Soon as Possible
Even if your phone seems to work normally after drying, hidden corrosion may continue damaging internal components.
Professional technicians can:
- Open the device safely
- Clean corrosion
- Dry internal components
- Test the battery
- Inspect the motherboard
- Replace damaged parts if needed
Early inspection greatly increases the chances of saving your device.
Signs Your Phone Has Water Damage
Even after drying, watch for these symptoms:
- Screen flickering
- Touchscreen not working
- Charging problems
- Battery draining quickly
- Speaker sounds muffled
- Camera fogging
- Phone overheating
- Random restarts
- Face ID or fingerprint sensor not working
If you notice any of these issues, have your phone checked immediately.
Can Waterproof Phones Still Get Water Damage?
Many newer smartphones have water-resistance ratings such as IP67 or IP68, but water-resistant does not mean waterproof.
Water resistance can weaken over time due to:
- Drops or impacts
- Worn-out seals
- Previous repairs
- Age of the device
Even water-resistant phones can suffer damage after prolonged exposure or contact with saltwater.
How to Prevent Water Damage
Protect your phone by following these tips:
- Use a waterproof phone pouch near water.
- Avoid using your phone in heavy rain.
- Keep drinks away from your workspace.
- Use a protective case.
- Never charge your phone with wet hands.
- Keep your phone out of bathrooms with high steam levels.
Why Choose DeviceFixx for Water Damage Repair?
At DeviceFixx, we specialize in diagnosing and repairing water-damaged smartphones using professional tools and proven repair techniques.
Our Water Damage Repair Services Include
- iPhone Water Damage Repair
- Samsung Water Damage Repair
- Google Pixel Water Damage Repair
- Charging Port Cleaning
- Motherboard Diagnostics
- Battery Replacement
- Screen Replacement
- Data Recovery Assistance
- Camera and Speaker Repair
Why Customers Trust DeviceFixx
- Experienced repair technicians
- Advanced diagnostic equipment
- High-quality replacement parts
- Fast turnaround times
- Transparent pricing
- Friendly customer support
Whether your phone was dropped in a sink, pool, ocean, or exposed to rain, our team is ready to help restore your device.
Final Thoughts
Dropping your phone in water doesn’t always mean it’s beyond repair. The first few minutes are critical, and taking the right steps can significantly improve the chances of recovery.
Turn off the device, avoid charging it, skip the rice, and have it professionally inspected as soon as possible. Acting quickly can prevent corrosion, protect your data, and save you from the cost of replacing your phone.
If your device has been exposed to water, don’t wait for the damage to worsen. Early professional repair is the best way to extend the life of your phone.